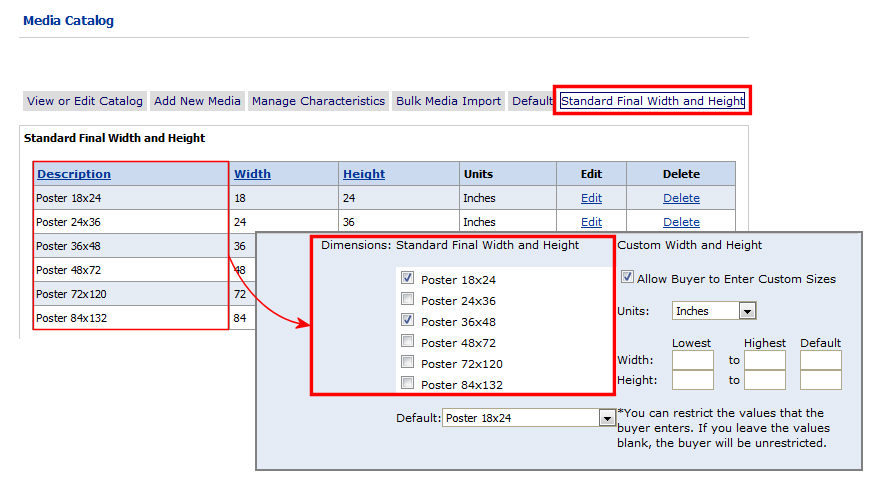
You can create standard width and height dimensions for printed products (i.e., does not apply to non-printed products). If the catalog item is so configured, buyers will then be presented with the pre-defined standard dimension/s and be enabled to enter a custom size (as configured) when ordering products.
Note that these settings are for the final size of a product, not necessarily themedia size. For example: a 10’ x 3’ banner and a 24” x 36” poster that may be printed on continuousmedia.
Note: Setting final width and height is for the convenience of both buyers and printers. It will cause buyers to be shown a pull-down list of standard size prints that the printer offers so they don't have to enter a Custom Width and Height. It lets printers limit options for a product to a standard set of size options.
Note on Finished Sizes: The finished
size of a product is the intended size of the product after it is "finished"
(i.e, after it has been printed and finished per buyer options). The buyer's
job may be printed on a larger sizemedia and, for example, trimmed to
accommodate bleeds on the finished size product. A poster with a finished
size of 12x18" can be printed on Super-B Media (13x19") and
then trimmed to the finished size.
Finished Size specs can come either
from buyers entering a custom width and height for a product (if you enable
this option on the Products > Settings page) or from the Print Shop that provides buyers with standard
final width and height options for a product (by selecting from the available
media sizes on the Product > Settings page as shown in the section
below).
To set a Final Width and Height for printed products
1. On the Media
Catalog > Standard Final Width and Height tab configure the
final width and height using the fields below.

2. Units: Select the unit of measurement the standard width and height.
3. Description: Type a descriptive name for the standard final width and height setting.
Note: Be clear in your description because buyers may see this description.
4. Width: Type the width (in the units selected above) for the standardmedia size.
5. Height: Type the height (in the units selected above) for the standardmedia size.
6. Click Add to save the dimension setting and make it available for associating with products.
Note: To use the standard final width and height setting, you must associate any products that use the standard finished size with a ticket template that supports the Final Width and Height options (for more information, see To create (or edit) a ticket template. The finished sizes will then be available to select for a product on the Create Products | Settings page (for more information, see To create a product).
● To managemedia characteristics
● To editmedia catalog entries
● To removemedia from the catalog
● To perform a bulkmedia import